| 일 | 월 | 화 | 수 | 목 | 금 | 토 |
|---|---|---|---|---|---|---|
| 1 | 2 | 3 | 4 | |||
| 5 | 6 | 7 | 8 | 9 | 10 | 11 |
| 12 | 13 | 14 | 15 | 16 | 17 | 18 |
| 19 | 20 | 21 | 22 | 23 | 24 | 25 |
| 26 | 27 | 28 | 29 | 30 | 31 |
- maVen
- table
- window
- SQL
- vaadin
- 보조정렬
- tomcat
- 공정능력
- R
- Kotlin
- Eclipse
- GIT
- xPlatform
- Spring
- NPM
- Android
- SPC
- MSSQL
- es6
- hadoop
- Express
- mybatis
- react
- JavaScript
- 정렬
- Python
- Sqoop
- mapreduce
- Java
- IntelliJ
- Today
- Total
DBILITY
독거 가능성 100% 노후에 라면값이라도 하게 센스를 발휘합시다!😅
Please click on the ad so that I can pay for ramen in my old age!
点击一下广告,让老后吃个泡面钱吧!
老後にラーメン代だけでもするように広告を一回クリックしてください。
next-auth 기초 정리 본문
NextAuth.js
Authentication for Next.js
next-auth.js.org
nmp install next-auth
nextjs 13.2부터 App Router에서는 app/api 하위에 auth/[...nextauth]디렉토리를 생성하고, route.js 파일을 작성한다.
OAuth중에 github을 사용해 본다. 실은 이번에 처음 사용하게 되었다.
route.js
import NextAuth from "next-auth";
import GithubProvider from "next-auth/providers/github";

export const authOptions = {
  providers: [
    GithubProvider({
      clientId: process.env.GITHUB_ID,
      clientSecret: process.env.GITHUB_SECRET
    })
  ]
  secret: process.env.NEXTAUTH_SECRET //JWT generation secret
};

const handler = NextAuth(authOptions);

export {handler as GET, handler as POST};
provider는 kakao,naver..등등 다 있다.
참고로 NEXTAUTH_SECRET은 ( openssl rand -base64 32 ) 요런식으로 생성 하는게 좋다고 나와 있다.
client component여야 버튼 클릭이 되니까 Sign in/Out시 사용할 component도 준비한다.
'use client'
import {useSession, signIn, signOut} from "next-auth/react";

export default function SignInOutButton(props) {
  //콜론은 '분해하려는 객체의 프로퍼티: 목표 변수’와 같은 형태
  const {data : session} = useSession();
  console.log(session);
  return (
      <>
        {
          !session ?
              <button style={{marginLeft:"5px"}} onClick={() => signIn()}>Sign In</button> :
              <button style={{marginLeft:"5px"}} onClick={() => signOut({callbackUrl:'/'})}>SignOut</button>
        }
      </>
  )
}
session처리가 필요하니 layout.js를 수정한다.
SessionProvider로 감싸고 보니 다음과 같이 Server Component들은 React Context를 사용 할 수 없다고 오류가 난다.
error Error: React Context is unavailable in Server Components그렇다면 client component를 통해야 한다는 것인가?! 만들었다.
'use client'
import {SessionProvider} from "next-auth/react";

export default function NextAuthSessionProvider({children}) {
  return <SessionProvider>{children}</SessionProvider>;
}
layout.js의 RootLayout에 session이 필요한 곳을 위에서 만들어 둔 콤포넌트로 감싼다.
export default function RootLayout({children}) {
return (
<html lang="ko">
<body className={inter.className}>
<NextAuthSessionProvider>
<navbar>
<SignInOutButton></SignInOutButton>
</navbar>
{children}
</NextAuthSessionProvider>
</body>
</html>
)
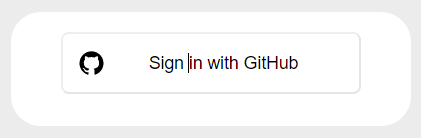
}[Sign In]을 클릭, 놀랍게도 다음과 같이 화면이 뜬다. 경로를 보니 /api/auth/signin으로 변경되어 있다.
심지어 인증이 되어 [Sign Out] 버튼이 보인다. 그런데, 저 화면도 커스터마이징이 되겠지?
Server Component나 App Route Handler에서는 session 참조할 때는 getServerSession(authOptions)를 사용하는데 EXPERIMENTAL_API라고 console에 출력되긴 한다.
route.js에서 사용한 예
import {NextResponse} from "next/server";
import {getServerSession} from "next-auth";
import {authOptions} from "@/app/api/auth/[...nextauth]/route";

export async function POST(request, response) {

  let result = null;
  const session = await getServerSession(authOptions);
  if (!session) {
    console.log("Please Sign In");
    result = {status: 400, message: "Please Sign In"};
    return NextResponse.json(result);
  }
  ...
}
page에서 사용한 예
import {getServerSession} from "next-auth";
import {authOptions} from "@/app/api/auth/[...nextauth]/route";

async function getData(props) {
  const post = fetch.....;
  return post;
}

export default async function Page(props) {

  const session = await getServerSession(authOptions);

  const post = await getData(props);

  return (
      <div>
        .....
      </div>
  );
}
Client Component에서는 useSession Hook을 사용 할 수 있다.
다음은 useSession을 사용한 예.
'use client'
import {useRouter} from "next/navigation";
import {useSession} from "next-auth/react";

export default function Page() {
  const router = useRouter();
  const {data: session, status} = useSession({
    required: true,
    onUnauthenticated() {
      alert("Please Sign In~");
      router.back();
    }
  });
  return (
    <>
    ...
    </>
  )
}
전통적 방식의 DB를 통한 인증을 사용할 경우
provider는 CredentialsProvider , adapter를 사용해야 한다고 한다. adapter는 공식사이트를 찾아 보자.
The Credentials provider can only be used if JSON Web Tokens are enabled for sessions. Users authenticated with the Credentials provider are not persisted in the database.
Credentials Provider는 session에 JWT가 활성화 된 경우에만 사용 할 수 있다.
https://next-auth.js.org/configuration/providers/credentials
Credentials | NextAuth.js
How to
next-auth.js.org
검색해 보니 db저장 시 암호화는 bcrypt로 hash처리하는 예가 많다.
const hashedPassword = await bcrypt.hash(body.password, 10);db model ( User, Account, Session, Verification Token ) 은 공식사이트에 나와 있다.
Verification Token은 암호 없는 로그인을 위해 token을 저장할 때 사용한다.

https://authjs.dev/reference/adapters
Overview | Auth.js
Using an Auth.js / NextAuth.js adapter you can connect to any database service or even several different services at the same time. The following listed official adapters are created and maintained by the community:
authjs.dev
mongodb를 사용하기 위해 docs를 보고 따라 해 본다.
사용자 정보 저장도 별도 collection이 필요하다. name,email,password 3개의 string type field를 만들었다.
만들었다기 보다는 collection만 생성하고 document를 입력하면 된다.
mongodb(humongous의 줄임말)는 nosql제품 중 document oriented db로 rdb의 table = collection, column = field , row = document라고 생각하면 된다.
npm install mongodb @next-auth/mongodb-adapterhttps://authjs.dev/reference/adapter/mongodb
@next-auth/mongodb-adapter | Auth.js
Official MongoDB adapter for Auth.js / NextAuth.js.
authjs.dev
dbconnect.js
import {MongoClient, ServerApiVersion} from "mongodb";

const url = process.env.MONGODB_URL;
const options = {
  serverApi: {
    version: ServerApiVersion.v1,
    strict: true,
    deprecationErrors: true
  },
  retryWrites: true,
  w: "majority"
};
let dbClient = null;

// In development mode, use a global variable so that the value
// is preserved across module reloads caused by HMR (Hot Module Replacement).
if (process.env.NODE_ENV === 'development') {
  if (!global._connection) {
    global._connection = new MongoClient(url, options).connect();
  }
  dbClient = global._connection;
} else {
  dbClient = new MongoClient(url, options).connect();
}

export {dbClient};
/app/api/auth/[...nextauth]/route.js
import NextAuth from "next-auth";
import GithubProvider from "next-auth/providers/github";
import CredentialsProvider from "next-auth/providers/credentials";
import {MongoDBAdapter} from "@next-auth/mongodb-adapter";
import {dbClient} from "@/lib/dbconnect";
import bcrypt from "bcrypt";

export const authOptions = {
  providers: [
    GithubProvider({
      clientId: process.env.GITHUB_ID,
      clientSecret: process.env.GITHUB_SECRET
    }),
    CredentialsProvider({
      // The name to display on the sign in form (e.g. 'Sign in with...')
      name: "로그인",
      credentials: {
        name: {label: "Name", type: "text"},
        email: {
          label: "Email",
          type: "email",
          placeholder: "example@example.com",
        },
        password: {label: "Password", type: "password"},
      },
      // Sign In process handle
      async authorize(credentials) {

        //const user = {id: "1", name: "Admin", email: "admin@admin.com"};
        try {
          if (!credentials?.name || !credentials?.email || !credentials?.password) {
            throw new Error('Name, Email and password required.');
          }
          const client = await dbClient;
          const db = client.db("nextstudy");
          let user = await db.collection('localUser').findOne({name: credentials.name, email: credentials.email});
          if (!user) {
            throw new Error('Name and Email does not exist');
          }
          const isCorrectPassword = await bcrypt.compare(credentials.password, user.password);
          if (!isCorrectPassword) {
            throw new Error('Incorrect password');
          }
          return user;
        } catch (e) {
          console.log(e);
          throw new Error(e);
          //return null;
        }

      },
    })
  ],
  pages: {
    //signIn: '/auth', // Custom Sign In Page
    error:'/auth/error' // Custom Error Page
  },
  session: {
    strategy: "jwt",
    maxAge: 10 * 60 // 10 minutes
  },
  callbacks: {
    async jwt({token, user, account, profile}) {
      // Persist the OAuth access_token and or the user id to the token right after signin
      console.log('user', user);
      console.log('account', account);
      console.log('profile', profile);
      if (user) {
        token.user = {};
        token.user.name = user.name;
        token.user.email = user.email;
      }
      return token
    },
    async session({session, token, user}) {
      // Send properties to the client, like an access_token and user id from a provider.
      console.log('session', session);
      console.log('token', token);
      console.log('user', user);
      session.user = token.user
      return session
    }
  },
  secret: process.env.NEXTAUTH_SECRET, //JWT generation secret
  adapter: MongoDBAdapter(dbClient)
};

const handler = NextAuth(authOptions);

export {handler as GET, handler as POST};
[Sign In] 클릭 하니 잘 된다.
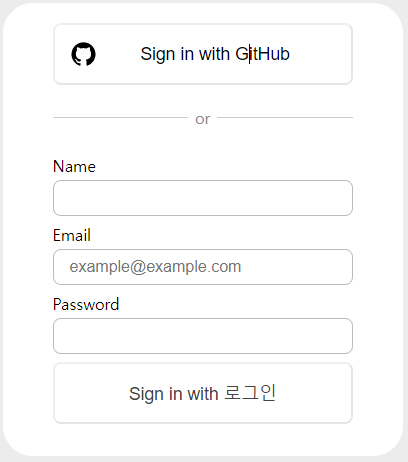
authorize에서 new Error(message)를 발생시키고 throw하면 error page에 queryString으로 전달되니 searchParams로 받으면 error를 출력할 수 있다. throw하지 않고 return null이면 Sign In 화면에 error가 표시 됨
error page default는 /api/auth/error/page.js로 override? 할 수 있고, 다른 경로 ( /auth/error/page.js ) 로도 처리 할 수 있다.
/auth/error/page.js
export default function Error({searchParams}) {
  console.log(searchParams);
  const {error} = searchParams;
  return (
      <div>
        {error}
      </div>
  )
}
별도의 login page 등은 pages : { signIn:'/auth' } 처럼 사용자 정의가 된다. 하기야 안되면 어떻게 쓰겠나.
export const authOptions = {
  .....,
  pages: {
    signIn: '/auth', // Custom Sign In Page
    error:'/auth/error' // Custom Error Page
  },
  .....
};
인증요청은 signIn() 함수로 할 수 있다. option에 callbackUrl 등 지정도 된다.
auth/page.js
'use client'
import {useCallback, useState} from "react";
import {signIn} from "next-auth/react";
import {useRouter} from "next/navigation";
import {ToastContainer, toast} from "react-toastify";
import 'react-toastify/dist/ReactToastify.min.css';
import {FaGithub} from "react-icons/fa";

export default function Auth() {

  const [name, setName] = useState("");
  const [email, setEmail] = useState("");
  const [password, setPassword] = useState("");
  const router = useRouter();

  const handleSignIn = useCallback(async () => {
    try {
      await signIn("credentials", {
        name, email, password, redirect: false, callbackUrl: "/"
      }).then((response) => {
        if (response.error === null) {
          router.push(response.url, {forceOptimisticNavigation: true})
        } else {
          console.log(response.error);
          toast.error(response.error, {hideProgressBar: true, autoClose: 2000});
        }
      });
    } catch (error) {
      console.log(error);
    }
  }, [name, email, password]);

  return (
      <div style={{textAlign: "center"}}>
        <div style={{display: "inline-block", width: "200px"}}>
          <h2>Sign In</h2>
          <div>
            <input type="text" id={'name'} placeholder={"name"} value={name} style={{marginTop: "6px"}}
                   onChange={(e) => setName(e.target.value)}/>
          </div>
          <div>
            <input type="text" id={'email'} placeholder={"email"} value={email} style={{marginTop: "6px"}}
                   onChange={(e) => setEmail(e.target.value)}/>
          </div>
          <div>
            <input type="password" id={'password'} placeholder={"password"} style={{marginTop: "6px"}} value={password}
                   onChange={(e) => setPassword(e.target.value)}/>
          </div>
          <div>
            <button style={{marginTop: "6px",cursor:"pointer"}} onClick={handleSignIn}>Sign In</button>
          </div>
          <hr/>
          <div>
            <FaGithub size={30} style={{cursor:"pointer"}} onClick={() => signIn("github", {callbackUrl: "/"})}></FaGithub>
          </div>
        </div>
        <ToastContainer></ToastContainer>
      </div>
  );
}
현재 page에서 응답을 처리하려면 signIn function options 중 redirect를 false로 해야 한다. authorize에서 error throw 없이 return null로 처리하면 응답 error가 CredentialsSignin가 넘어온다. retrun null을 제거하고, error throw하면서 message를 json string으로 처리해 줘야 되던게 안해줘도 된다. 말이 어렵다. error가 null이면 callbackUrl로 이동도 별도로 해주게 했다.
async authorize(credentials) {

        //const user = {id: "1", name: "Admin", email: "admin@admin.com"};
        try {
          ....
          return user;
        } catch (e) {
          console.log(e);
          throw new Error(e.message);
        }
}
아무튼 위처럼 해보니 된다.

github 아이콘을 누르면 계정이 등록이 되어 있으면 바로 로그인 되고, 없으면 github login이 보인다.
github login에 성공하면 mongodb collection user와 account에 정도가 입력되어 있다.
nextjs에 middleware가 있는데, 특화된 것이겠지만 next-auth/middleware도 있다. 나중에 보자.
https://next-auth.js.org/configuration/nextjs#secret
Next.js | NextAuth.js
unstable_getServerSession
next-auth.js.org
'front-end & ui > nextjs' 카테고리의 다른 글
| next.js 13 기초 정리 (0) | 2023.04.18 |
|---|
